Posts

Showing posts from March, 2018

SOLID HEART

Image
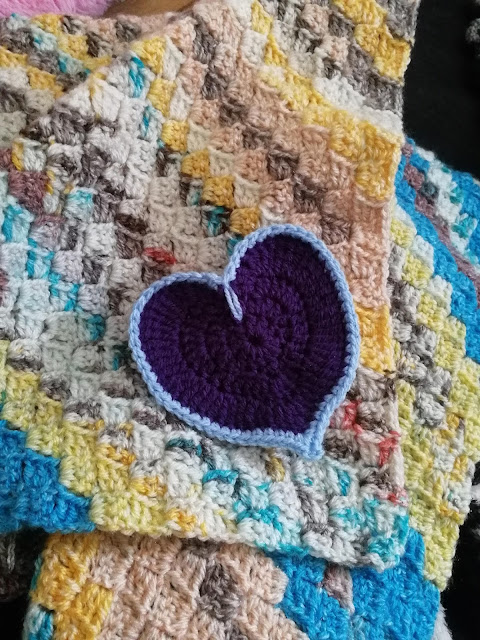
A simple crochet heart can both be used on its own or as an embellishment for a larger project. Below, I will explain my way of making a solid crochet heart. (The pattern was also created by me.) The key to making a heart successfully is to increase the height of the stitches as you increase the umber of laps. Also, it is important to expand the heart and add stitches in places where that it beneficial. In this pattern, you see that stitches are only added in places that are meant to be rounder and also, taller stitches are used in places that should be pointier. This variation in stitch number and height at certain points in the lap is what separates making a heart from making a simple circle.  Also please note that to look its finest, you need to give the heart a little pull and tug once you're finished, to make sure that every stitch finds it's place.  Good luck and feel free to comment any questions or concerns.

C2C

Image
C2C is one of the most common and quickest stitches, especially when it comes to larger projects. Getting started with C2C, on the other hand, can be confusing and frustrating for many. Today, I would like to explain the simplest way I know of to do C2C.  EXPANSION At this stage, you will be adding size to your project. This is also where you decide how large your project will be.  You will begin with a chain of 6 stitches. Then, you will turn around and place a double stitch into the 3rd stitch of the chain, followed by two more double stitches, one per stitch of the chain respectively. You now have a tiny square.  Without disconnecting, you will make another chain of 6 stitches and repeat the process, by putting a double stitch into the 3rd stitch of the chain and then 2 more directly following it. Then, you will insert your hook into the top 'corner' of your previous little square and connect the two. Now you need to make a chain of only 3 stitches, followed by three double

SOLID GRANNY SQUARE

Image
Hello everyone! Today I'd like to tackle one of the most common patterns when it comes to crochet- the solid granny square. To begin with, I have drawn a diagram/pattern of the beast:  I have marked the separate laps with red and black respectively. The green dots represent where you will need to close the lap by joining stitches. Finally, the simple blue stitches on the outside could be a good way to end the square but are by no means a must.  You will begin by making a simple ring of, I recommend, 4 stitches. If that feels too tight for the particular yarn you're using you can make more stitches or do a magic ring, whatever floats your boat will probably work.  Then, for the next lap, you will follow a simple rhythm: three double stitches, three stitches in a chain (just the same as the classic granny square).  The 2nd lap is where attention to detail really is of paramount importance. For the double stitches that you already have from the previous lap, you will make one doub