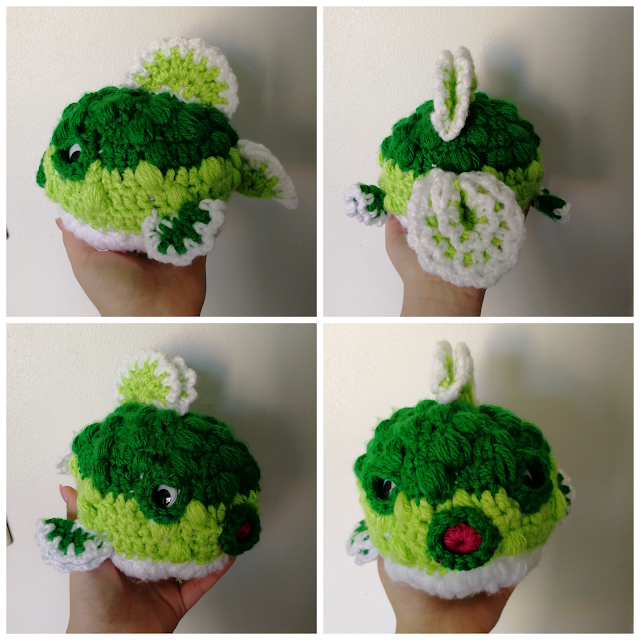
Posts

JELLYFISH

Image
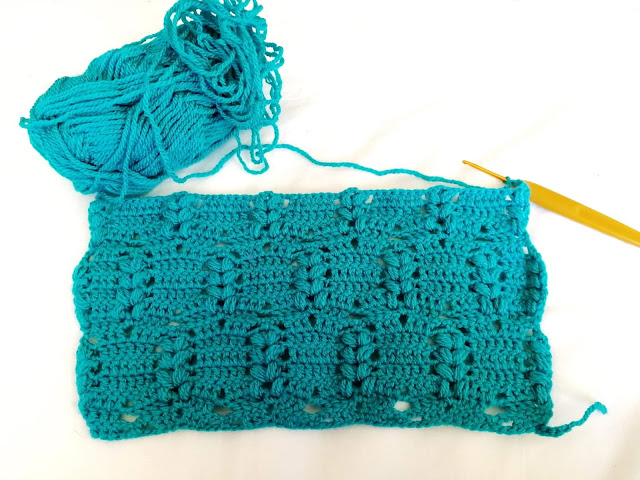
JELLYFISH PATTERN Stitches you will need to know.    …or Google SC –  slip stitch DC –  double stitch Chain  (it is what it is) Ring  (a chain but closed end to end into a ring) Popcorn  (yes, the stitch, not the food)              To create a popcorn stitch, place 5dc into the same sc of the previous round. The trick is to not “close” the dc:s. Instead, only pull the yarn through them once and then let them hang on your hook while you do the next one. When all five stitches are halfway done, pull your yarn through all of them at the same time, ending them as if they were all one stitch. Shell  (it is good if you at least know what they look like) THE JELLYFISH Do not worry about making a mistake or two, or thirty along the way. Unless you are actively trying, there are very few ways to mess up this pattern to a point where it looks bad. Come on, it is a droopy, prickly jellyfish. Bloopers will only make it look more realistic! Body: The rounds t

PUFF BRAID STITCH

Image
Rule: 10ch per section + 1 Make chain of desired length.  (...) - into same stitch  * - dc that goes into respective dc from previous row  # - attach to resepective chain from previous row  [...] - start of row, do not repeat  ¤ - into same stitch from previous row Vch - V-stitch with a specisied number of ch stitches between the two dc  Row 1: [(ch3+dc), 2dc,] ch2 skrip 2st and attach to 3rd, ch2 skip 2st then 2dc, Vch2, directly followed by 1dc. End row with Vch1 into last stitch of previous row.  Row 2: [ch3 into first dc from previous row, 3dc*,] ch2 followed by 3dc*, ch2#ch2 directly followed by 3dc*. Repeat, end row with 1dc*.  Row 3: [(ch3, puff3)into first dc from previous row, ch1, 2dc*, Vch1*, 2dc*, ch1,] puff3 into ch2 of previous row, ch2, puff3 into next ch2 of previous row, ch1, directly followed by 2dc*, Vch1*, 2dc*. Repeat, end row with ch1, (puff3, 1dc) into last dc of previous row.  Row 4: [(ch3, puff3)into first dc from previous row, ch1,] 6dc*. ch1, (puff3, ch2, puf

Bathroom mat

Image
ch 45  sl st down whole row 10 rows of sl st  dc 1 to 1 down entire row, at the end of row, 2 sl st into last dc, then 5 sl st into short side of the rectangle, ch 3, continue with row of dc:s on the other side of the rectangle, at the end of row, 2 sl st into last dc, then 5 sl st into short side of the rectangle,   attach to 1st stitch of lap with a slip  sl st around the whole perimeter, 1 to 1, corners: 2 sl st per 1 st of previous row, for the 3 stitches on the corners (doesn't have to be exact)  sl st 1 to 1 around the whole perimeter place the mat flat, have the yarn underneath it and your hook on top, plunge the hook into the work and bring up the thread from underneath, slip stitch two laps this way, going along the creases of the previous laps  slip stitch and bring the tread to the edge of the work again, make a regular sl st, (ch 3, dc 2) cluster, ch 2, dc 3 cluster, ch 2... around the perimeter, attach together ch to 1st cluster with sl st sl st between clusters, ch 2,

Floral baby blanket

Image
The beginning:  ring of 3  ch 6, dc into ring, ch 3, dc into ring, ch 3, dc into ring, ch 3, dc into ring, ch 3 and attach to the 3rd stitch of the first chain  ch 3 up, 2 dc into ch (from previous row), 3 dc into next ch, ch 2, 3 more dc into same ch, 3 dc into next ch, ch 2, 3 dc into same ch, 3 dc into next ch, ch 2, 3 dc into same ch, 3 dc into next ch, ch 2, attach to the top of 1st ch.  sl st into ch you just finished, ch 2, sl st after 3 dc (from previous row), ch 2, sl st after 3 dc... continue until the end of row, attach last ch to 1st sl st.  corners: 3 dc, ch 2, 2 dc all in same ch. sides: 3 dc per ch... continue until end of row.  alternate 4 and 5 until you get the size that you want The flowers:  Start this after you've done a row of ch:s.  sl st into nearest ch (previous row), ch 5, attach ch with sl st to the next ch of the previous row, ch 5, sl st, ch 5, sl st... corners: sl st, ch 5, sl st into same ch, ch 5, sl st into next ch.  sl st to the "top" of

BLOWFISH (puffer)

Image
Body:  1. ring of 3 2. 8 slip stitches (sl st) into ring 3. 2 double crochet (dc) into 1, followed by a cluster of 5 (cl of 5) slips into the next stitch, repeat 4. 2dc in 1, 2dc in 1, cl of 5, repeat (note: first set, skip first 2dc in 1) 5. dc, 2dc in 1, cl of 5, repeat  6. dc, 2dc in 1, cl of 5,  repeat  7. dc, cl of 5, repeat change color  8. 3dc, cl of 5,  repeat  9. 5dc, cl of 5,  repeat  10. 7dc, cl of 5,  repeat  change color  11. dc, reduce every 10th  12. cl of 3 (between the dc), reduce every 5th  13. cl of 3, reduce every 3rd  14. cl of 3, reduce every 2nd  15. sl st  16. sl st, reduce every 2nd  17. sl st, reduce every 2nd  18. pull closed the hole remaining, place an extra sl st if needed  Eye sockets:  1. ring of 6  2. sl st 10 into ring  3. dc   Mouth:  1. ring of 4  2. 12 dc into ring  change color  3. sc  Fins/flippers/tail:  1. ring 5  2. 1 dc, 1 chain stitch (ch),  repeat  3. (dc, ch, dc)in 1,  repeat (skip for flippers)  change color  4. sl st between dc, 3ch,  rep

SMALL OWL (cluster stitch)

Image
Before you begin, you will need to know how to make a cluster stitch.  The technique I used is as follows:  The body:  1. ring of 4 2. 10 slip stitches into ring 3. slip stitch, increase 1 for every 2nd stitch 4. double crochet stitches, increase 1 for every 3rd stitch 5. cluster stitches (as shown above) of 3 slips, no change in stitch total           repeat this for lap 6 - 9           recommended to change color for lap 10  *** 10. cluster stitches of 3 slips  11. slip stitch, no change in stitch  number total  12. slip stitch, no change in stitch number total ( recommended to change color before 13)  13. slip stitch, increase 1 for every 3rd stitch  14. slip stitch, increase 1 for every 3rd (! note that you need to double the very last stitch of the lap as well, to make the count work)  15. 8 double crochet stitches, 11 slip stitches, 8 double, 11 slips 16. 8 double, 11 slip, 8 double, 11 slip  17. 4 slip stitches, fold the round hole in half and slip stitch together the two edges

PURSE- basket weave

Image
The basket weave stitch:  Begin by making a chain of 40. For the next row, you will do double crochet stitches. 1 stitch per previous stitch, so that your total number remains 40.   Now, this is where the 'fun' begins.  For this particular project, my sections of the weave consisted of 4 stitches each.  The general principle of the basket weave is getting that woven texture, by alternating attaching the stitch towards the front or towards the back of the previous row.  So, you will begin by making 4 double stitches to the 'front' of the row (that is on the side facing away from you).  For the next 4, you will attach the double stitch to the 'back' (towards you).  Repeat this a total of 10 times, 5 sections for every direction.  Do a total of 18 rows, not counting the chain in the start.  This is what you should end up with:  The next step, is to fold this section in half and begin stitching together the edges.  What you will do is begin on one side, and go along